Welcome back to the blog! As you may have noticed, we have over 100 different colors and styles of hardwood floor to choose from. While we are proud to offer so many varied kinds of flooring, we know that this can make decisions difficult when it comes down to narrowing which one floor is right for YOU.

We hope this color spotlight series will provide you with the information you need to make an informed decision about which floor is right for your home! With that, let’s begin!

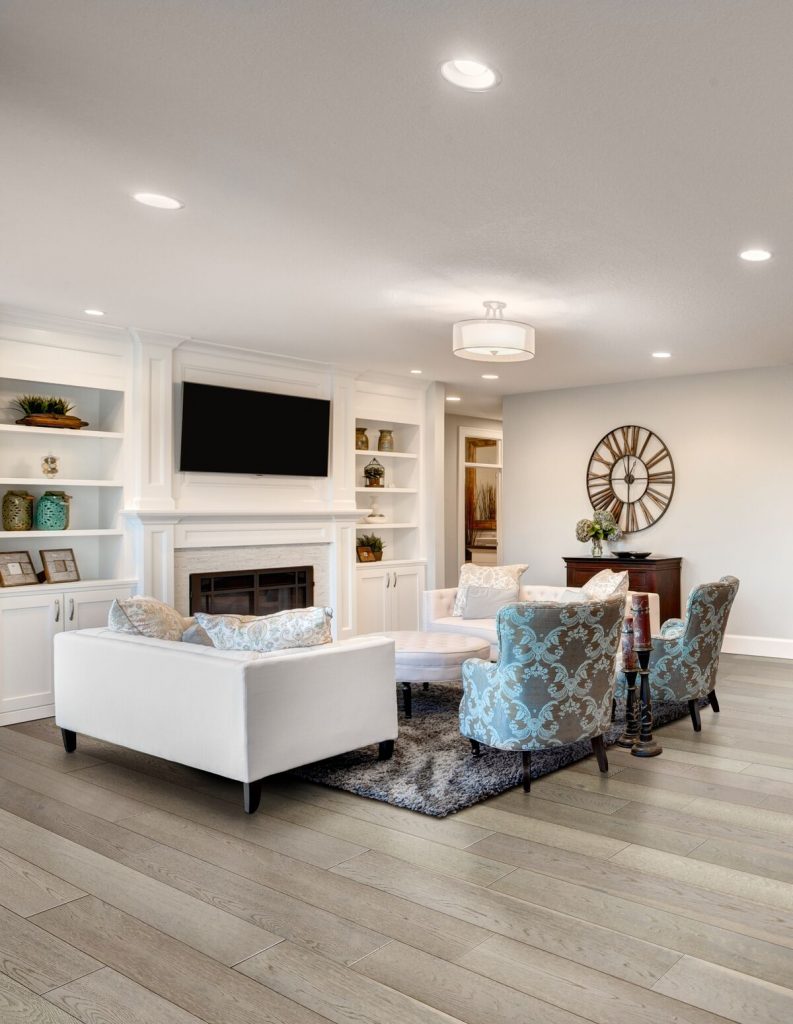
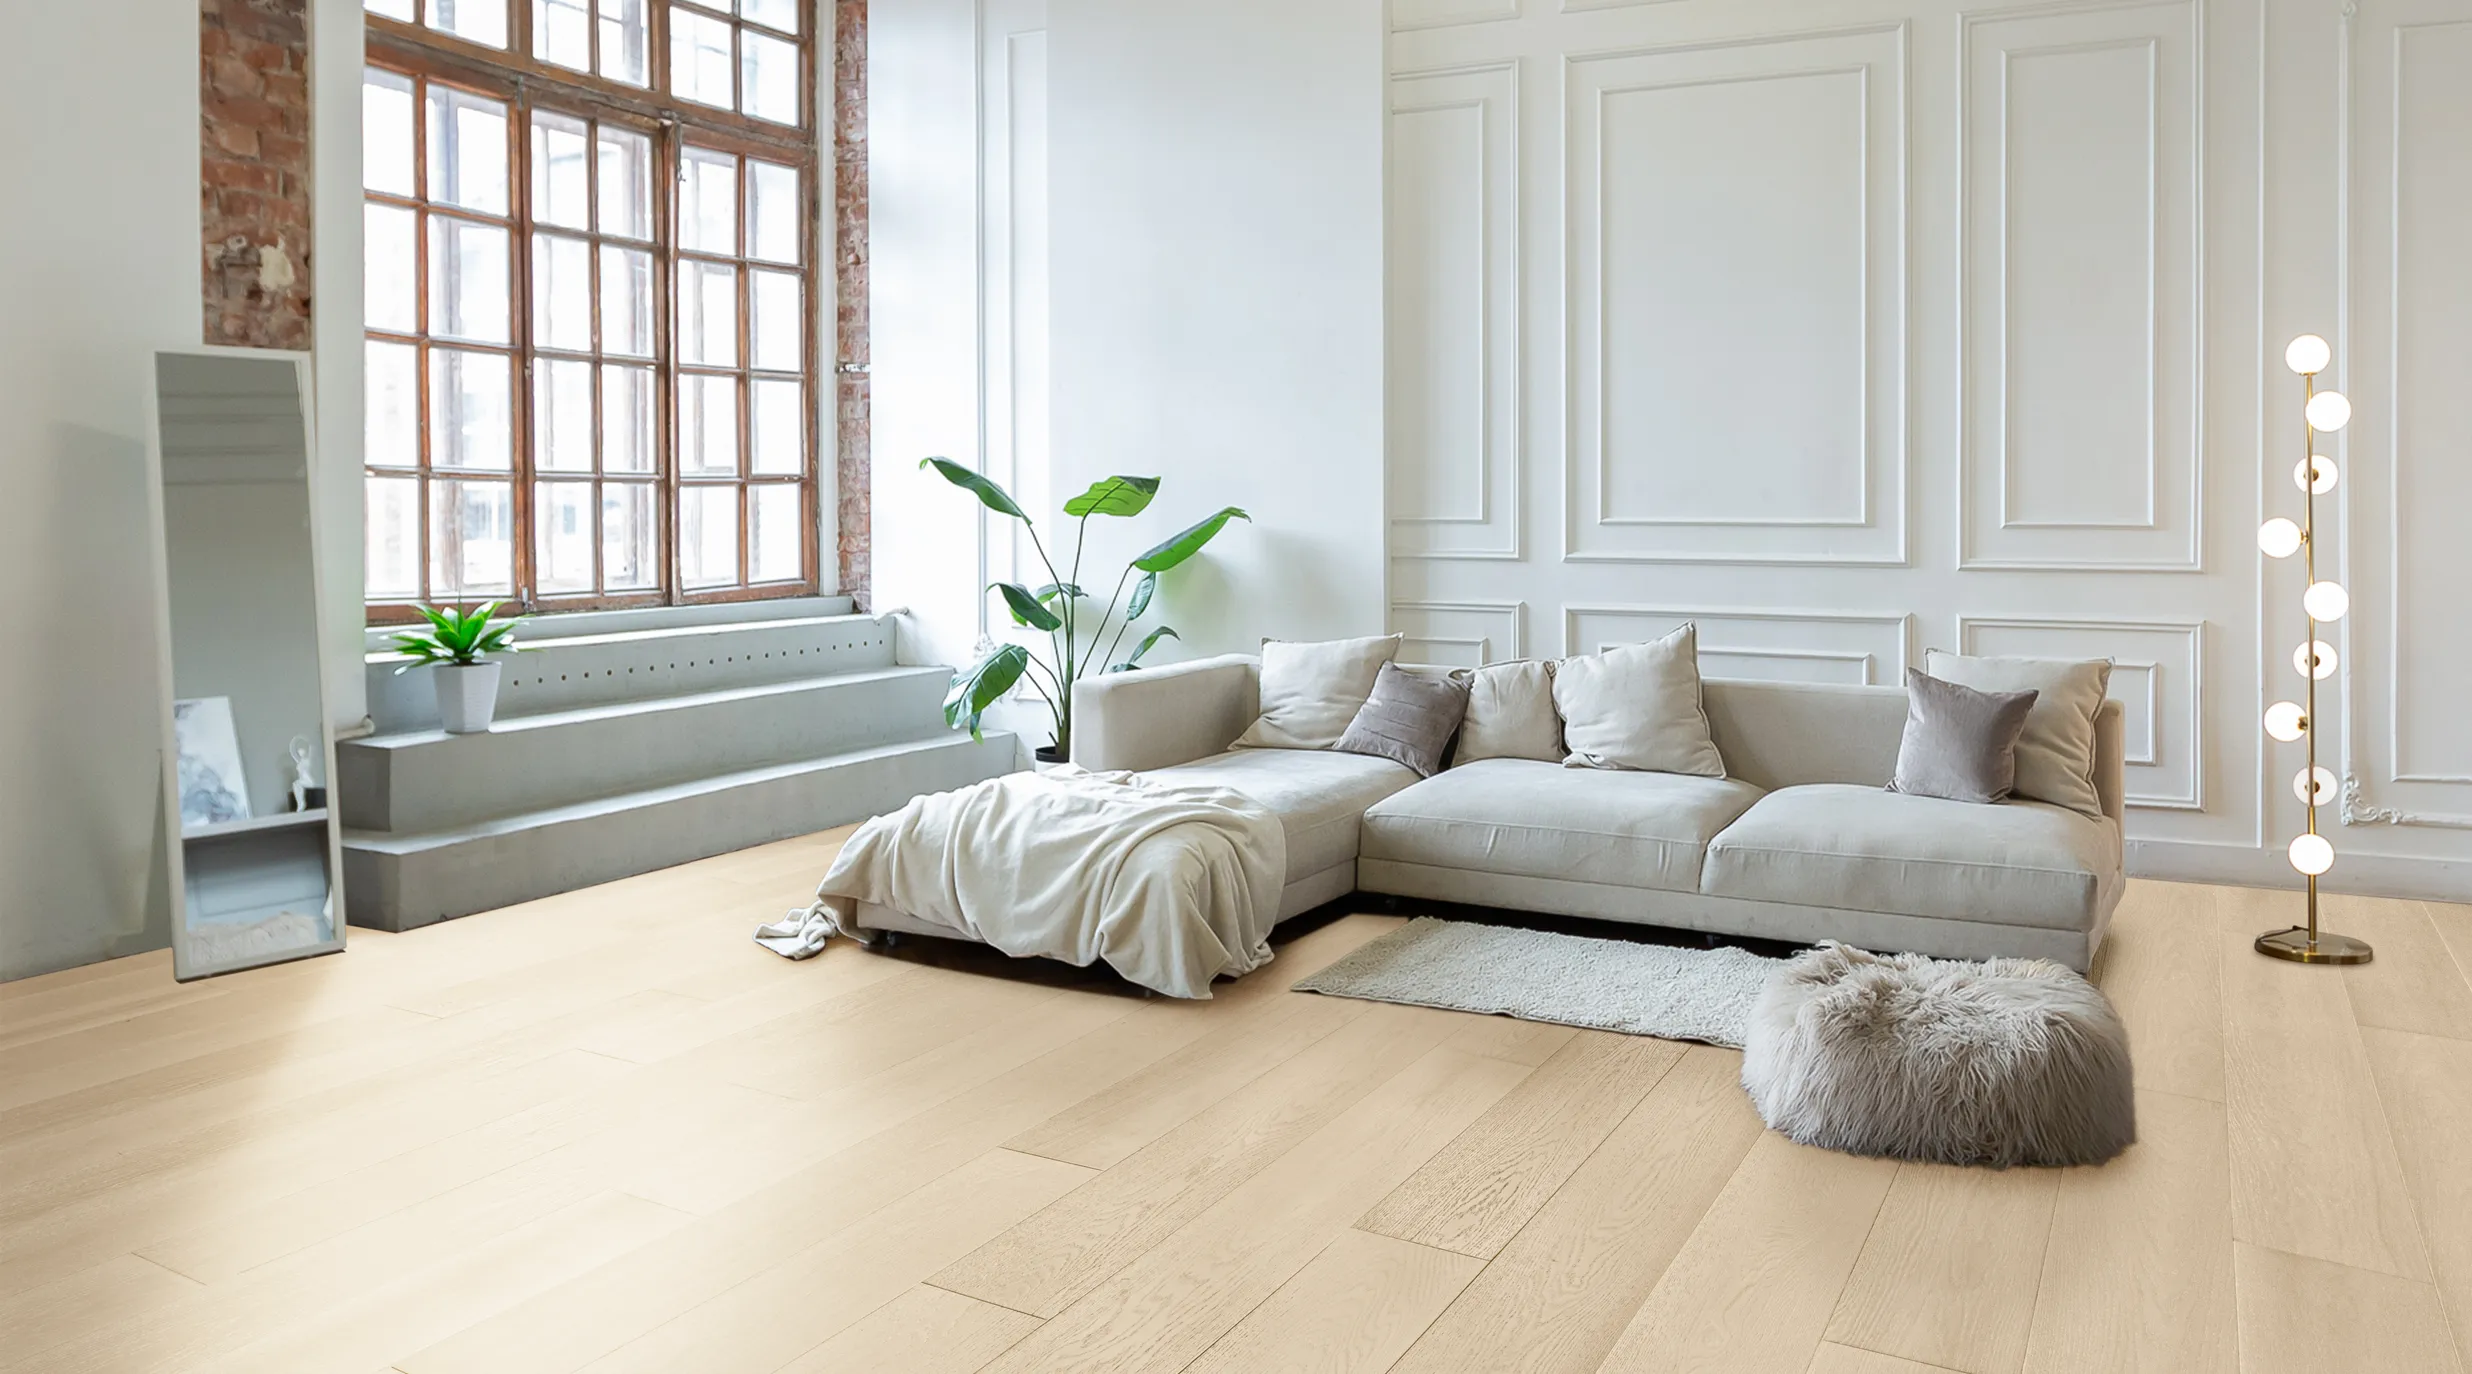
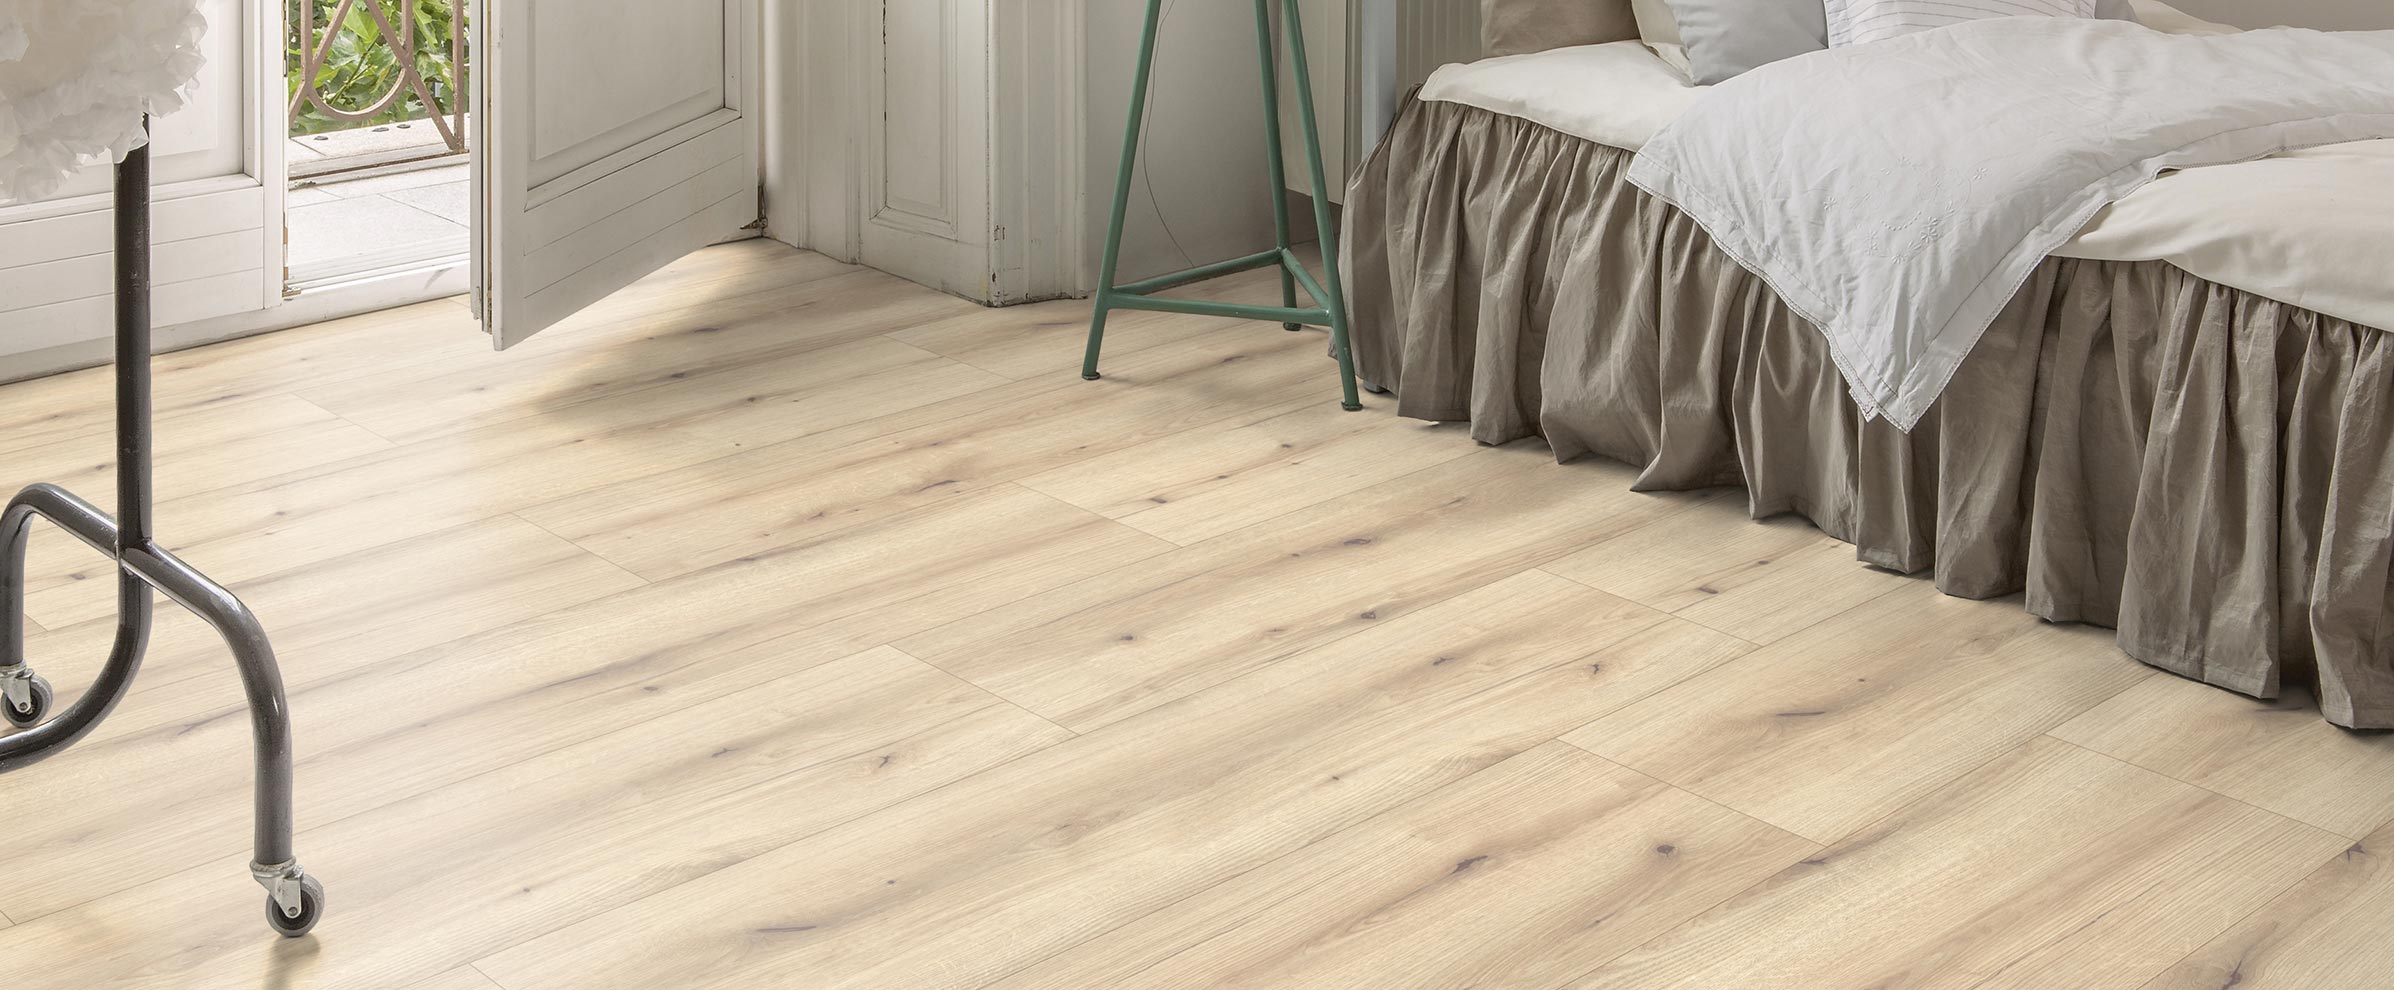
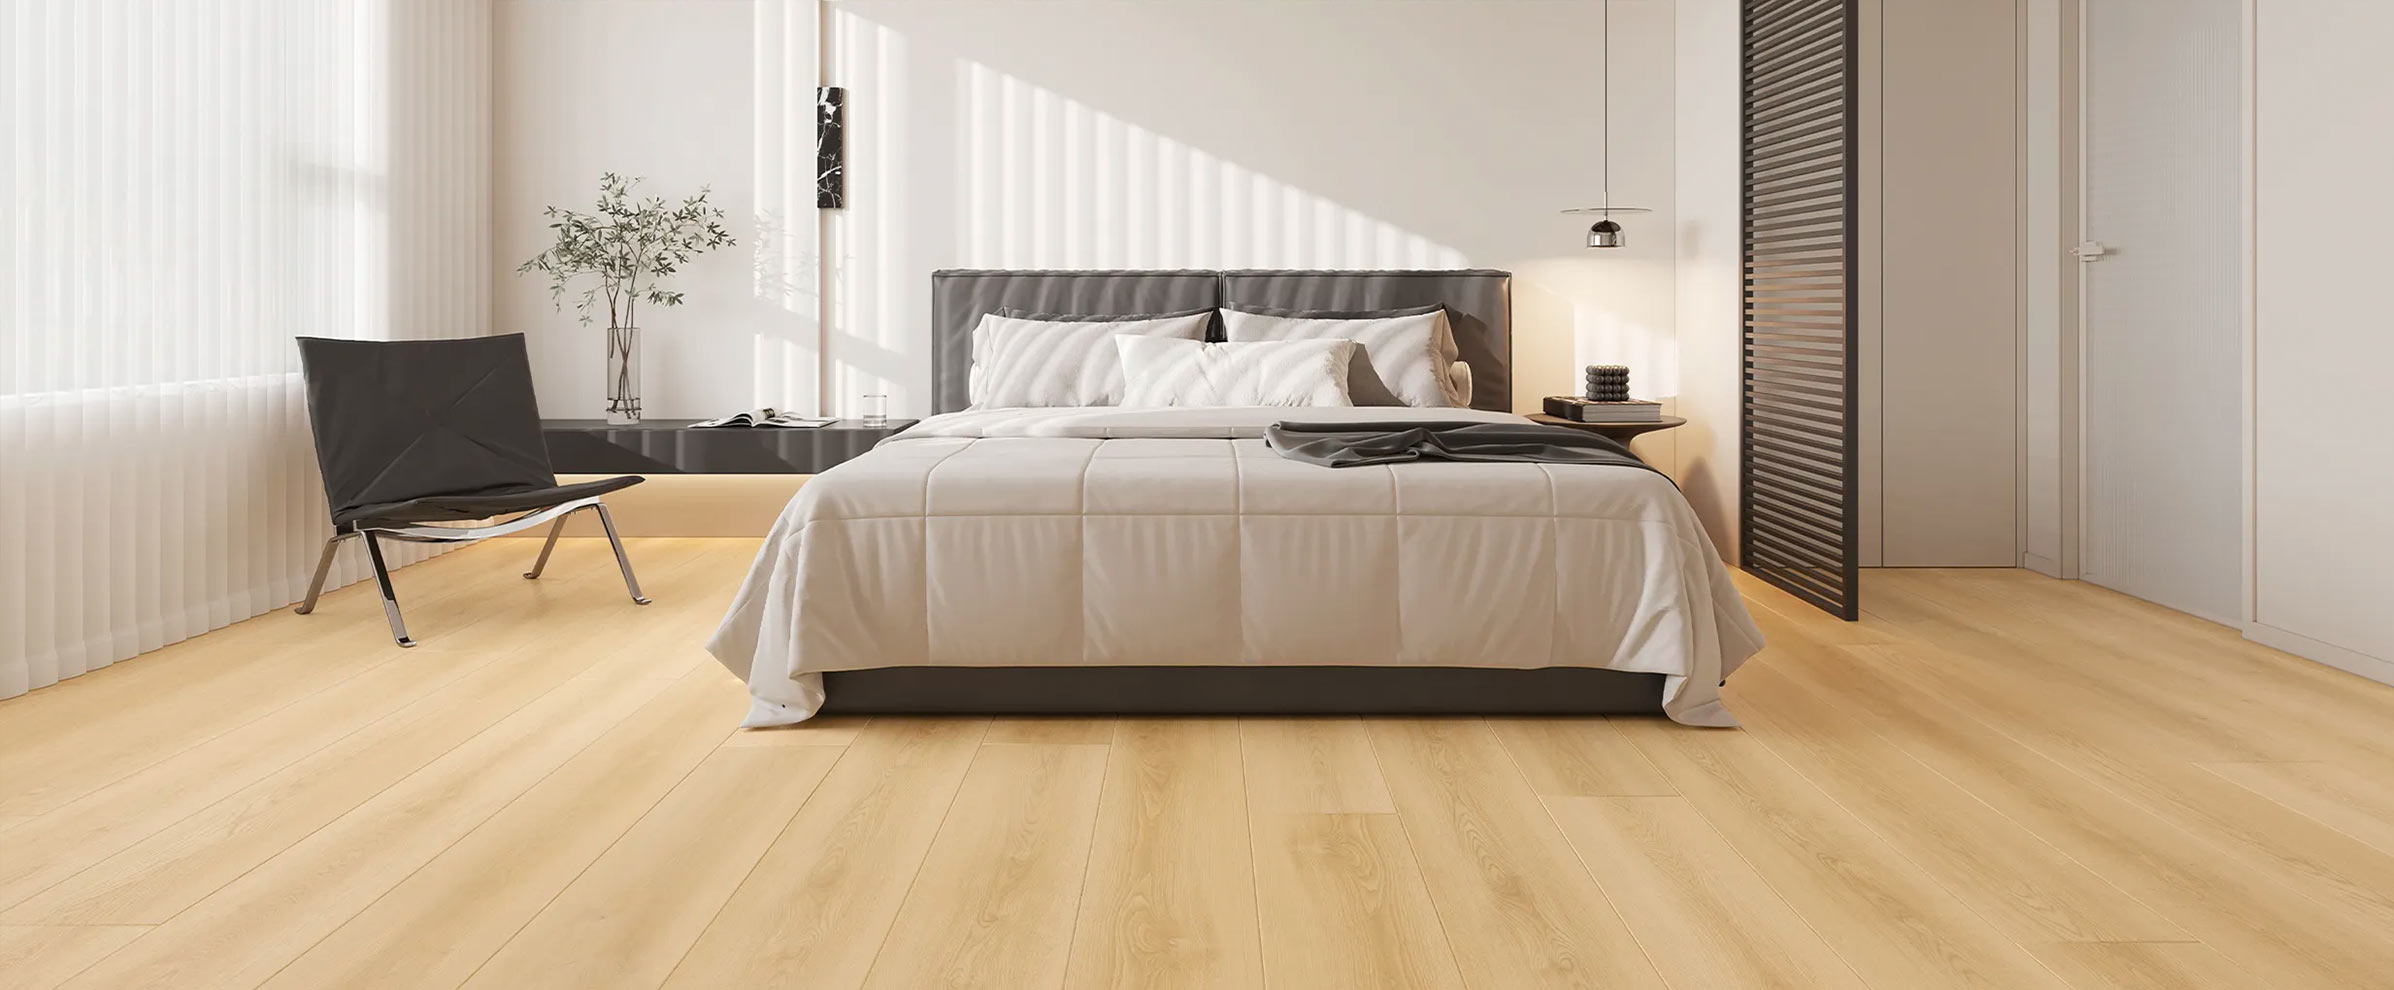
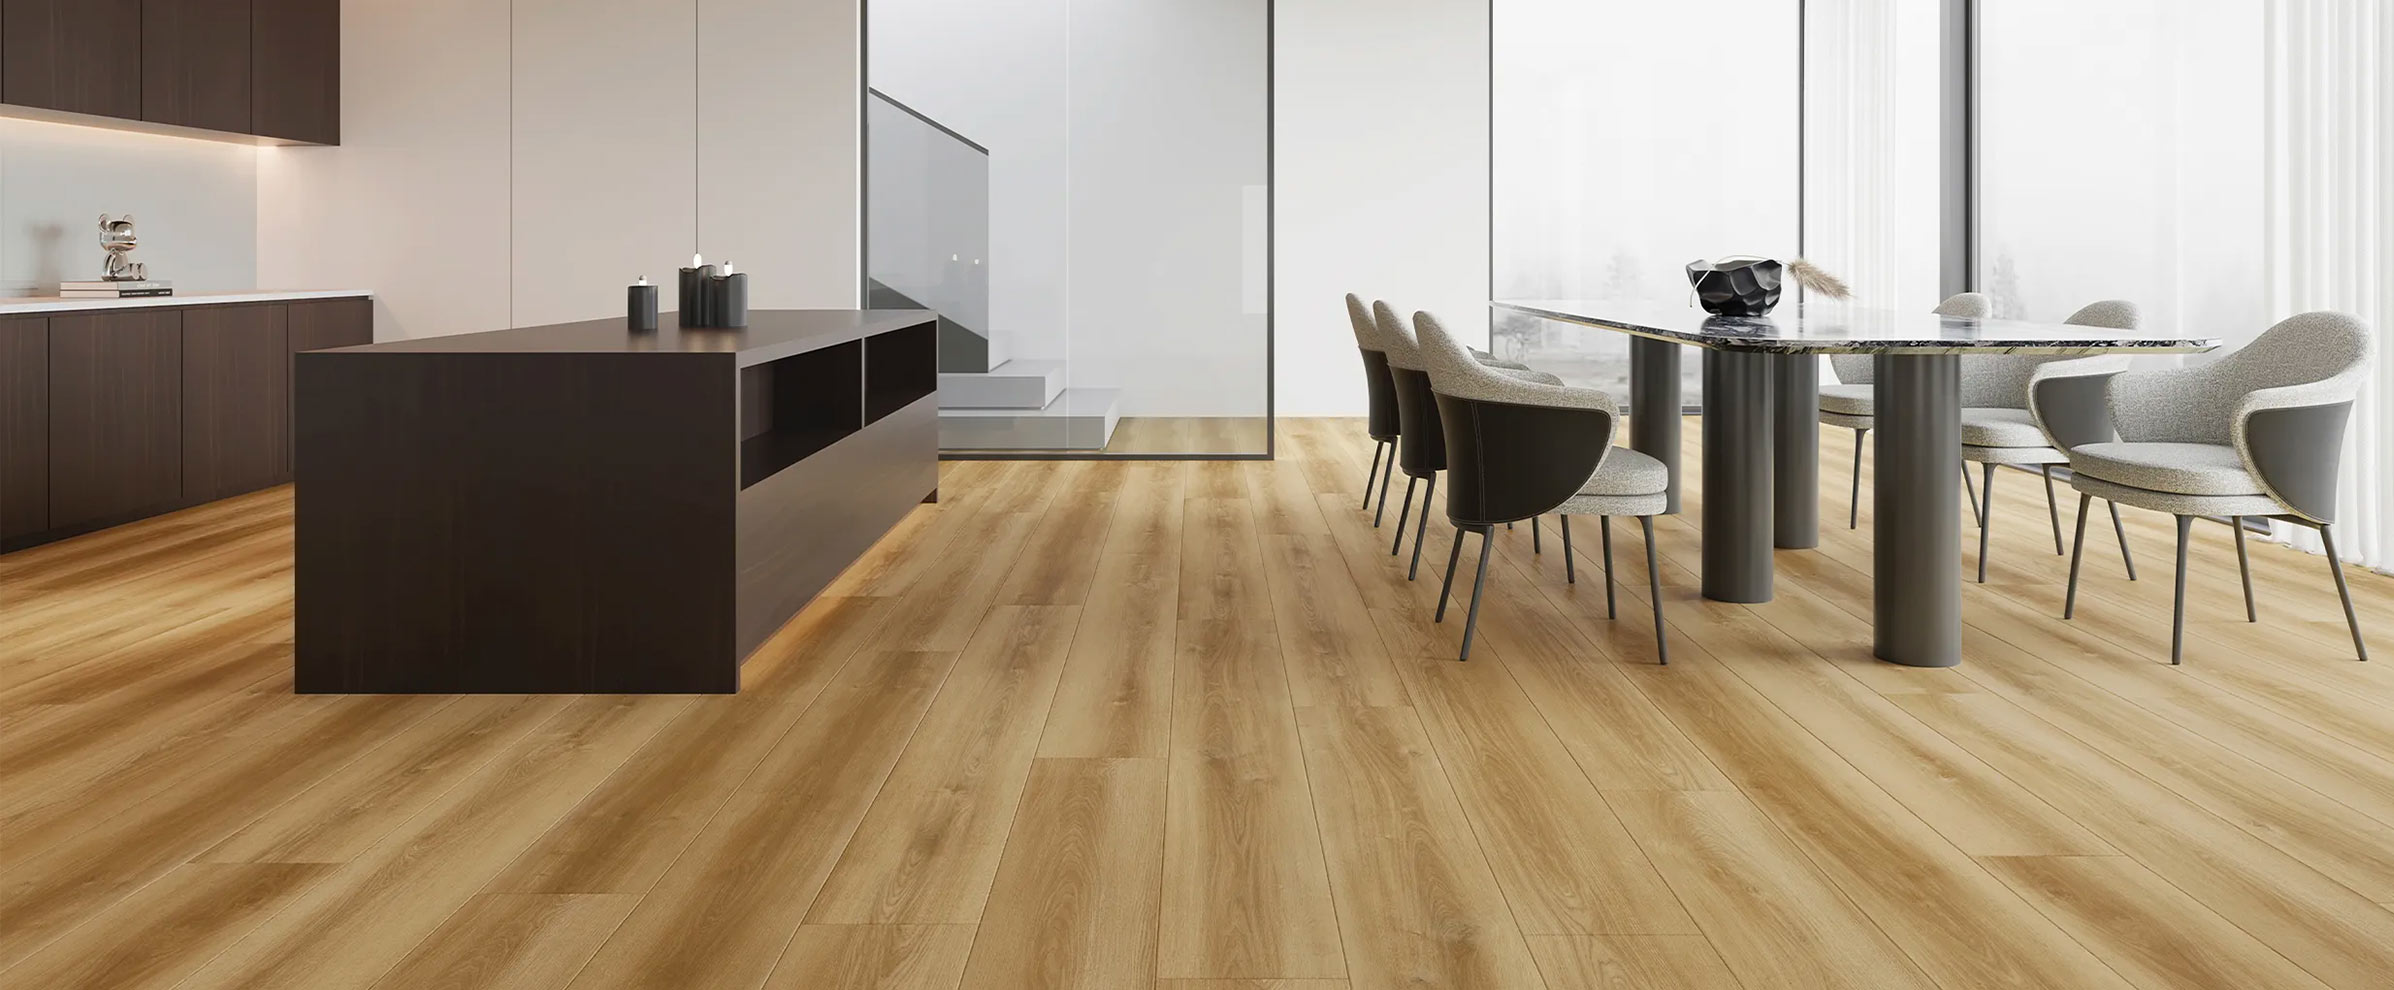
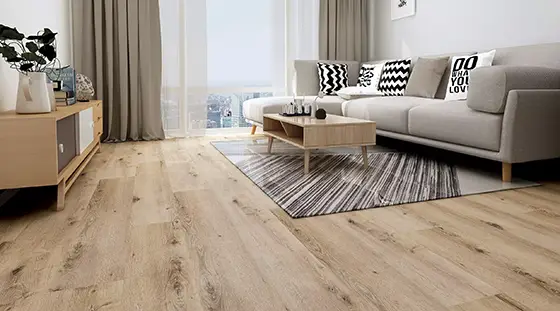
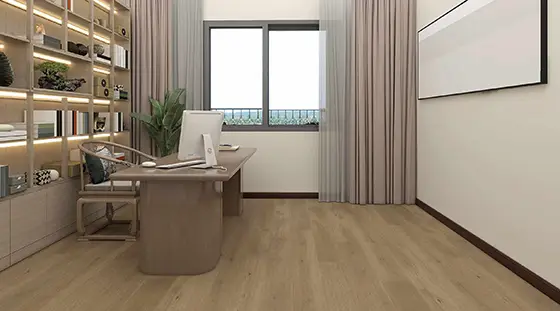
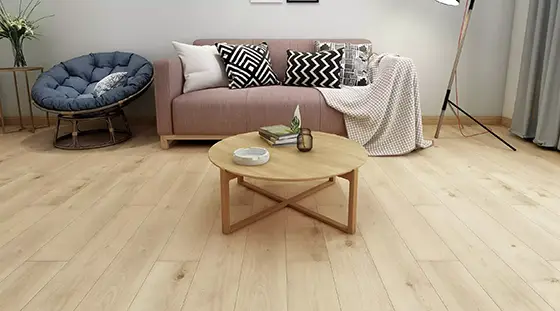
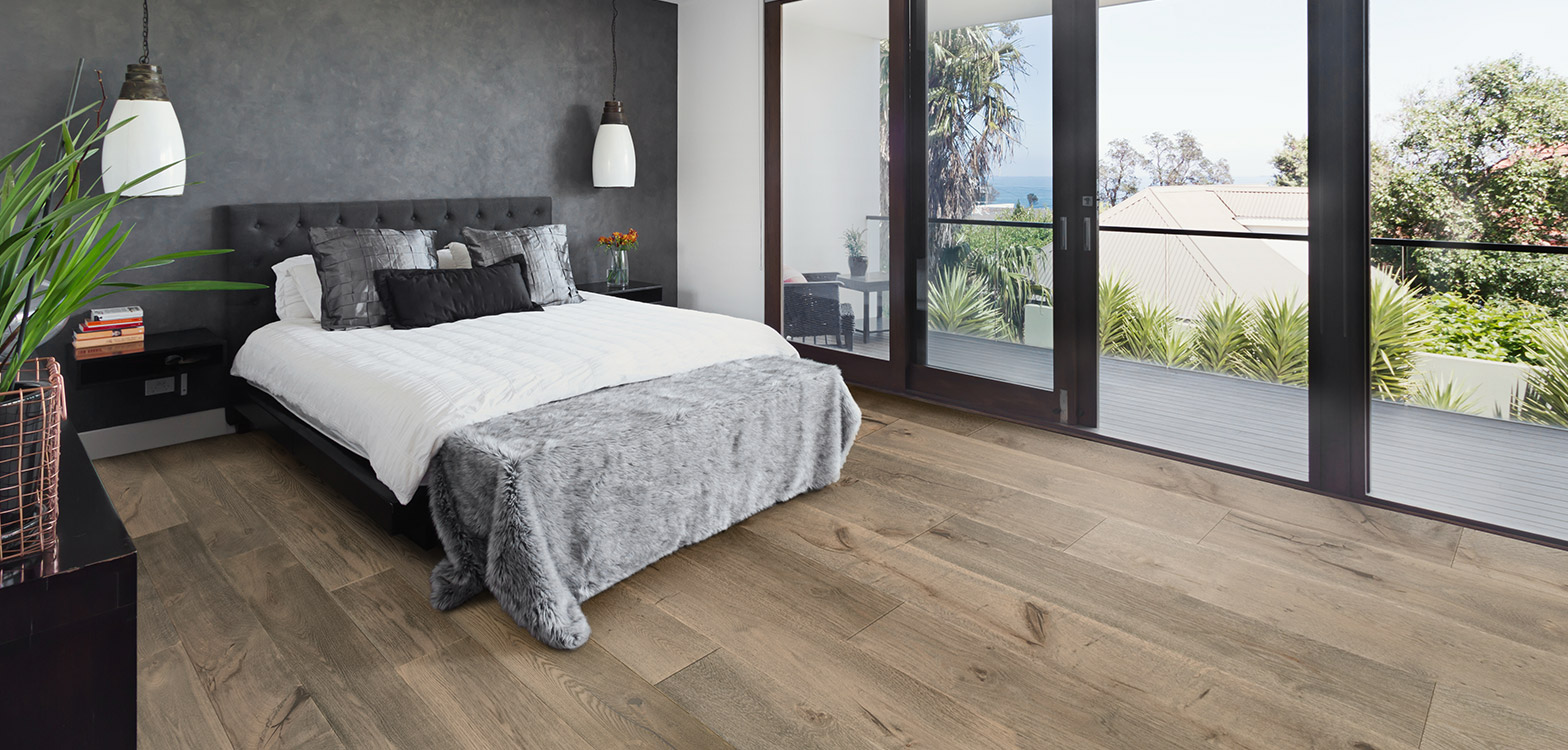
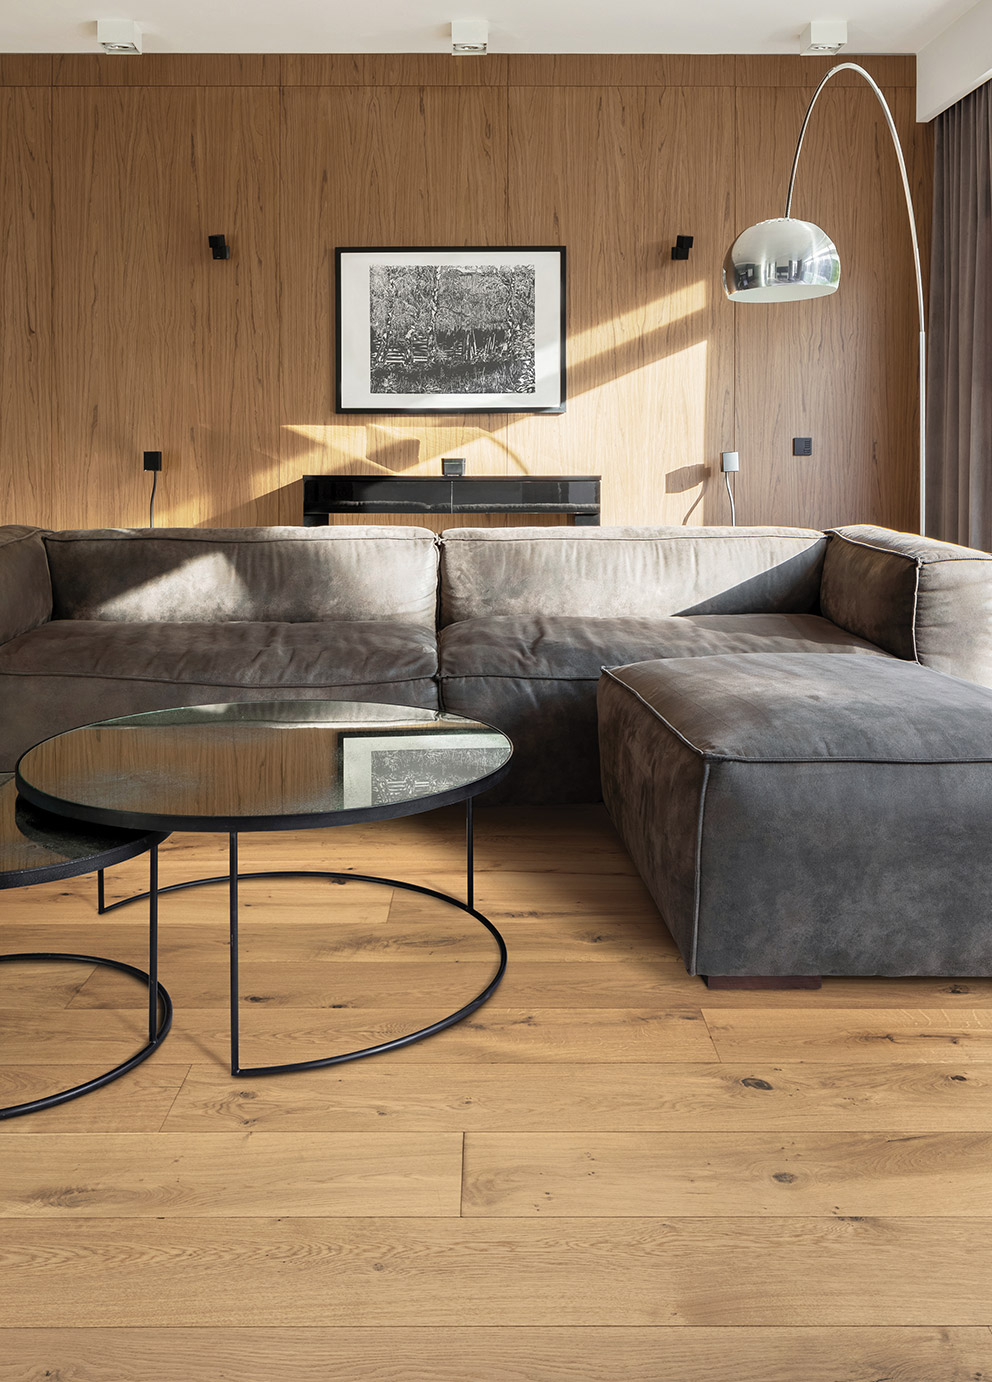
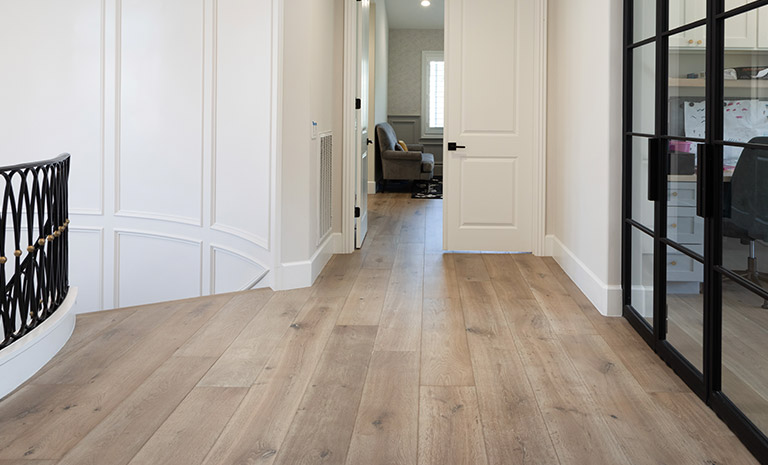
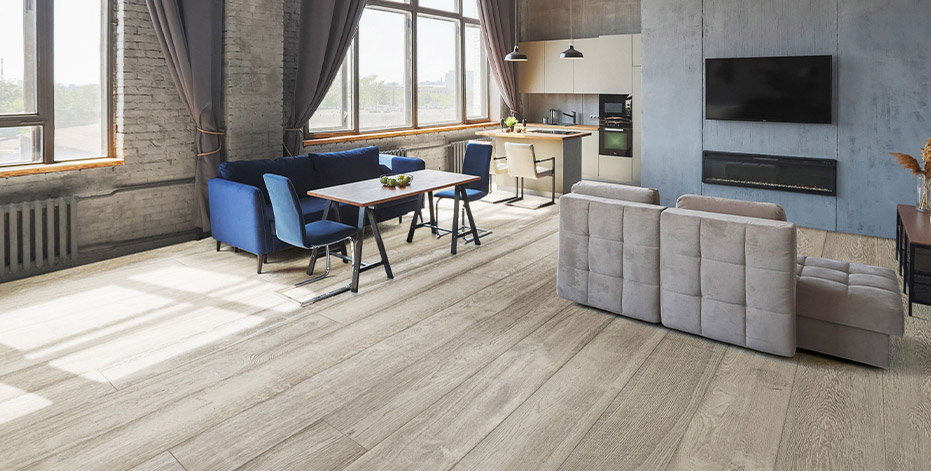
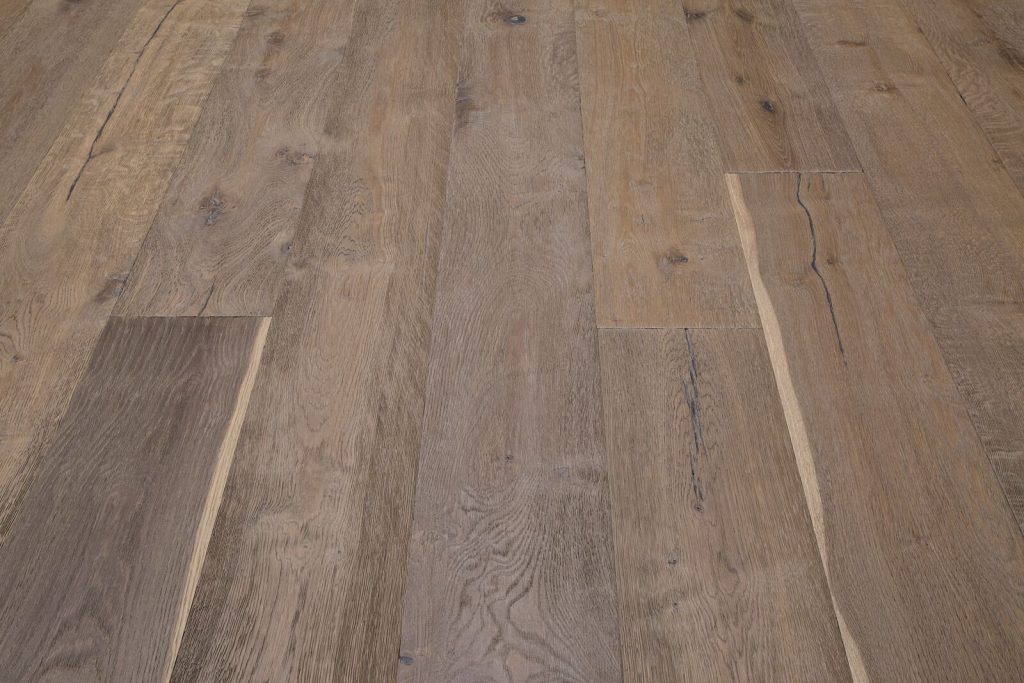
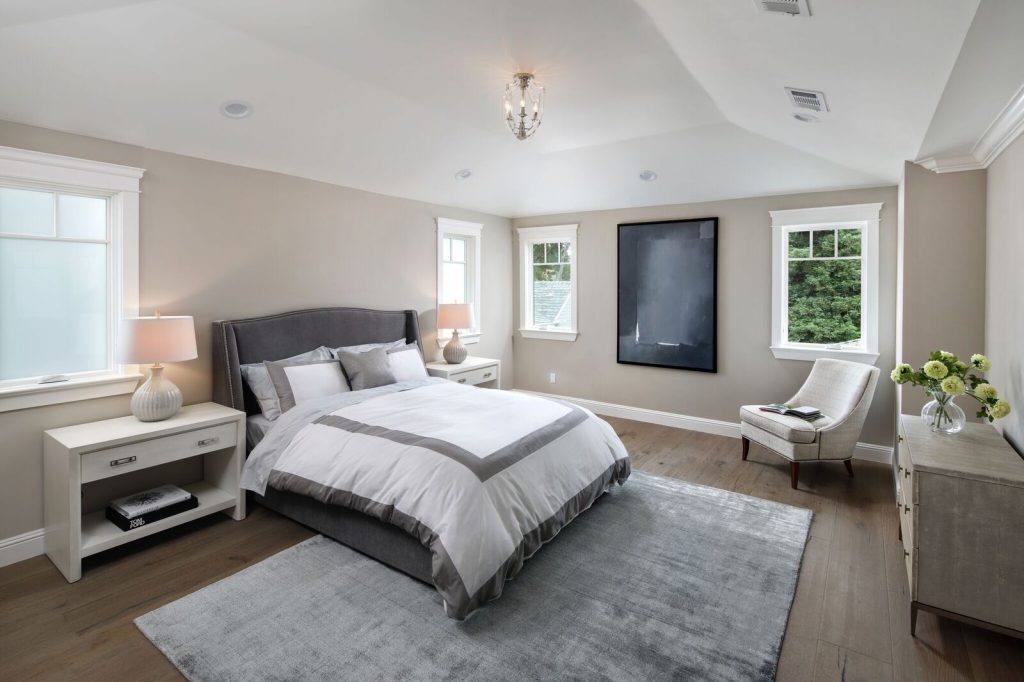
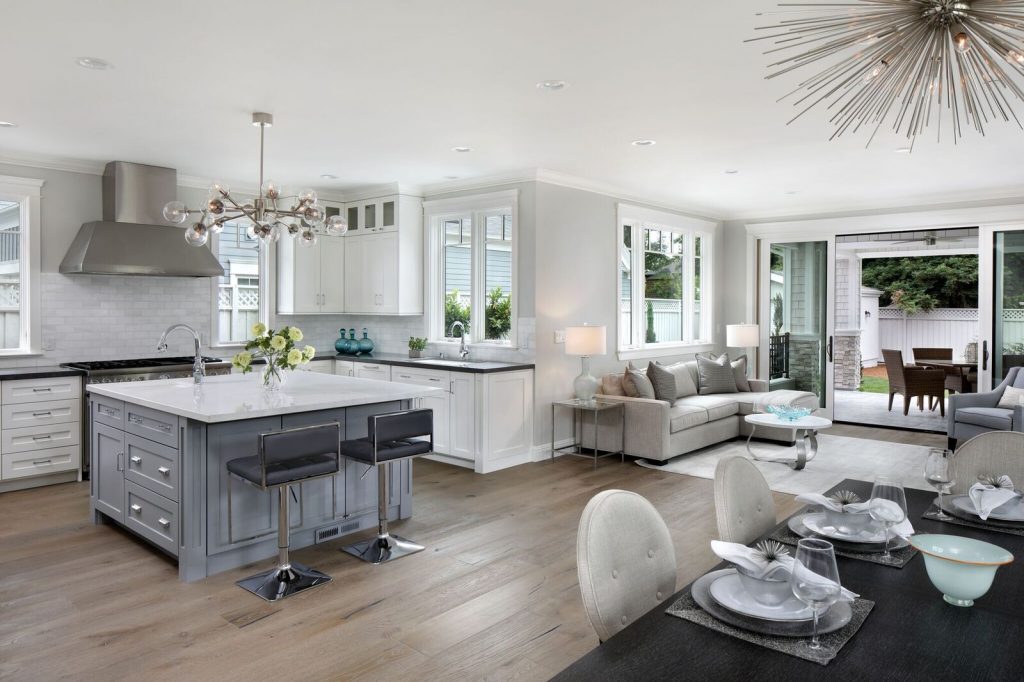
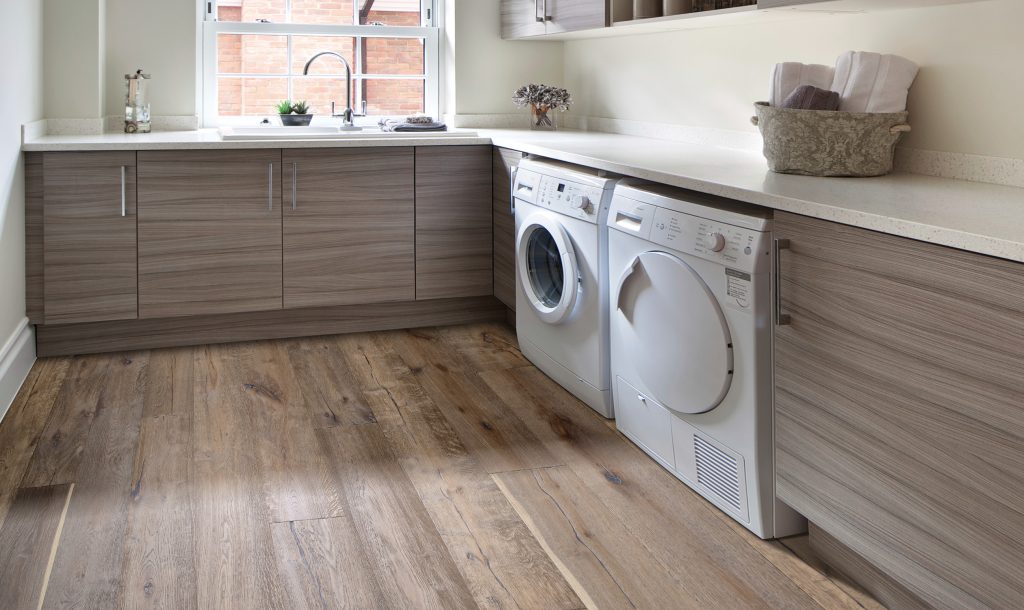
The Strauss was a welcomed addition to our Composer collection in 2015. With its neutral brown stain and 10.25-inch wide planks, it’s no wonder the Strauss is as popular as it is!

Strength & Durability

The Strauss boasts 10.25-inch wide planks made up of a strong, 8-ply engineered core and a beautiful 4mm wear layer of pure, genuine European oak wood. The top layer is sawn-face, meaning that you get to see the beautiful, natural grain patterns typical of European oak without the distortion caused by rotary peel methods. The surface is wire-brushed to highlight its deep textured grain and then hand-ground to create a timeworn look. The Strauss, given its strength of construction, matches with its durability. Kids and pets? No problem – the Strauss can stand up to high levels of foot-traffic and its beautiful texture masks scratching.

Aesthetic & Style

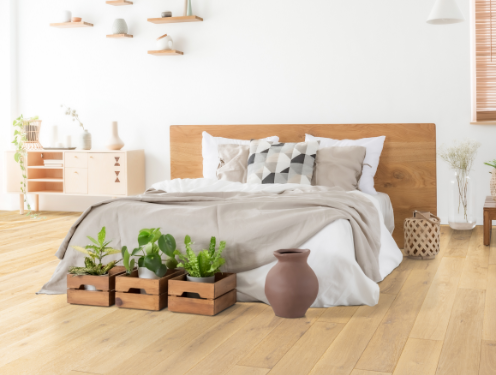
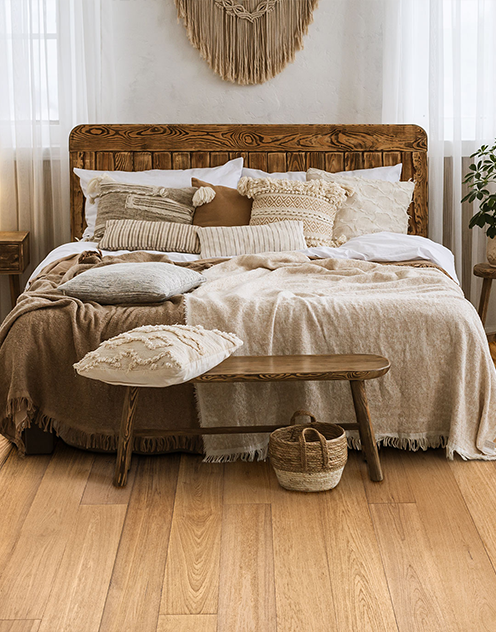
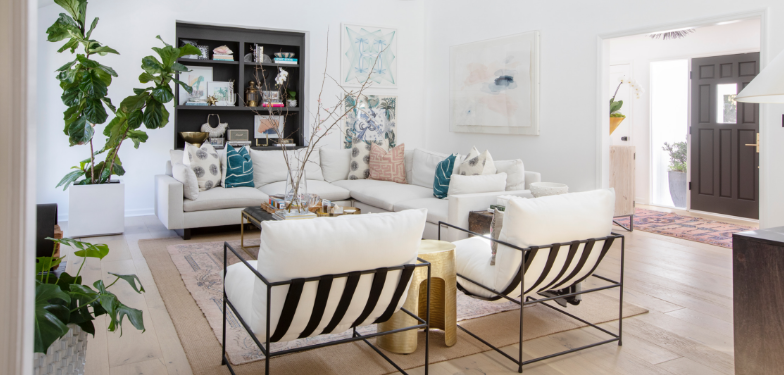
Textured to perfection, the Strauss awes with a full range of color variation including sapwood and mineral streaks. In addition to this, the Strauss’ bold grain patterns give the floor a reclaimed look. Whether you want to offset your modern, clean interior design with a rustic floor or embrace shabby chic, the Strauss may just be right for your home design!

So, what do you think? Is the Strauss’ reclaimed aesthetic the right look for your design?

View the Strauss on our website HERE.

Let’s Talk About Color: Gray Hardwood

Welcome back to our blog! As we end our series on color, we will be discussing the ever-so-popular gray hardwood! You may have seen a rise in gray hardwood floors in recent years and this is due to significant trending of this coveted aesthetic. Gray hardwood is very modern and easily compliments other modern home finishes such as nickel and stainless steel.

But is gray hardwood flooring right for you?

Savanna Elephant


Is gray hardwood floor just a fad?

With any significant trend in the interior design industry, it bears questioning if the popular materials of the time are future classics or simply passing fads. After all, hardwood flooring is a significant investment and it is important to know that your choice will stand the test of time.


Royal Court, Kingdom Series Chamberlain


The great thing about gray hardwood is that, passing trend or not, it is a neutral color choice that compliments an array of design styles. While gray hardwood floors tend to pair best with cool, modern designs, you can also bring warmth to any space with accent colors and natural wood decor.


Villa Caprisi Valentina

Which shade of gray – light or dark?

When it comes to selecting a shade or tone of gray hardwood flooring, there are many available options. A light gray floor and a dark gray floor will have many of the same pros and cons that we have discussed with previous posts in this series on light and dark hardwood.

Dark hardwood is leading modern trends and it is easy to see why. The contrast that dark wood and light furniture and décor is truly beautiful. While it is amazing on a larger scale, darker toned hardwood may not be the best option for a smaller space as it may make it appear even smaller than it actually is. Additionally, darker gray floors will show more dirt and pet hair than their lighter counterpart. Conversely, with a lighter gray floor, it can open up smaller spaces and create an illusion of the room being larger and works better to hide dirt and pet hair.


Royal Court, Kingdom Series Duke


So, what do you think about gray hardwood floor? Browse our entire selection of gray floors here!

No one hardwood floor is right for everyone and we are happy to be the provider of quality floors in numerous colors and styles.  We hope that this series on color has shed some light on which floor might be the right choice for you!


14 Tips for Engineered Flooring Care

Caring for your new engineered flooring is an important task to keep your floors looking great for years to come. Caring for engineered wood is very similar to caring for hardwood floors, but if you’re new to wood flooring, you may feel a little lost about which products to use and how to avoid damage during everyday use. Here are 14 tips to help you in caring for your engineered wood floors.

How to Care for Engineered Floors

  1. Most manufacturers recommend cleaning hardwood or solid engineered flooring with a damp mop or cloth only. If you find you need a little more cleaning power, purchase a cleaner made specifically for finished wood flooring. Remember, your engineered flooring is cared for mostly the same as you would for hardwood floors since the uppermost wear layer is comprised solely of hardwood.
  2. Always sweep or dust before you mop. Remove as much dirt and debris before mopping to avoid damaging your floors.
  3. Clean up spills as soon as possible. While engineered hardwood flooring is less susceptible to water damage than Solid hardwood flooring, prolonged exposure to liquids can result in damage.
  4. Use only a dry to damp mop or cloth for best results when cleaning.
  5. Protect your engineered floors from UV damage by pulling drapes or blinds during peak sunlight hours to shield your floors from direct sunlight.
  6. Place all houseplants and furniture on soft coasters or felt pads to avoid nicks and scratches.
  7. When cleaning your engineered hardwood flooring, wipe in the same direction as the wood grain for best results. This will help remove stubborn dirt from cracks and crevices in the flooring.
  8. You can choose to fill in nail marks created during installation by filling them with similarly colored wood putty. Simply wipe away any excess putty and gently clean the area with a small coat of urethane. Allow to dry for one hour.
  9. Sweeping or dusting your floors every day will help prevent a build up of dirt that will require hard scrubbing or cleaners to remove. Regular care is best for your engineered floors.
  10. Keep pets’ toenails trimmed and filed to avoid damaging your floors.
  11. Be sure to keep the moisture level of your home regulated year round to keep your engineered Hardwood floors looking great for years to come. Proper humidity control is essential for the long term upkeep of your floors.
  12. Hard water can leave a dulling effect on your engineered floors over time. Use softened water or special hardwood floor cleaners to remove this mineral buildup and restore a natural luster your flooring.
  13. Do not place electronics directly on your engineered hardwood floors. The heat generated from electronics can damage your flooring over time.
  14. Choose your engineered floor care products carefully. Be sure to read the entire label before using a product on your engineered floors. In general, if a product is safe for use on hardwood floors, it is safe for your engineered flooring.
  15. Caring for white plank floors may require a little extra TLC. Never bleach or use detergents containing bleach on your white plank engineered floors. To keep your floors white, avoid using well water (which may contain staining iron) and clean your floors daily.

Caring for your engineered flooring properly will ensure your floors stay beautiful for years. For more tips on caring for your new engineered floors, contact Urban Floor, the premier producer of engineered hardwood flooring since 2003.

The Great Flooring Debate: Should you put flooring beneath counters and appliances?

cabinet

Before you start remodeling your master bathroom or installing a brand new kitchen, you should first stop and ask yourself a question that has been puzzling people for years. Should you bother to lay hardwood flooring beneath your appliances and cabinetry, where nobody is going to see it?

Most folks will ponder that puzzle for only a few minutes before coming down on one of the argument or the other. But there are valid arguments to be made on both sides of the issue. So let’s have a look at what many home contractors and experienced homeowners and interior designers have to say.


Arguments for Complete Flooring

The general consensus among those who believe that yes, you should extend those beautiful hardwood floors even into unseen spaces, comes down to one major point. They feel that since nobody has a crystal ball to peek into the future, it’s always a good idea to leave yourself plenty of options later on down the road.

  • Let’s say, for example, that you skip the flooring beneath your kitchen counters. What happens years from now when you decide to upgrade that kitchen and rearrange the whole flow of the room?


  • Your choices are going to be dictated by whether or not you floored underneath those counters or appliances. If you did not, then when you move things around you’re inevitably going to wind up with big conspicuous blank spots where instead of polished hardwoods you have ugly plywood subflooring.


  • Had you gone the extra mile, then you would have wall-to-wall hardwoods. Your room would be a smooth canvas on which to draw up whatever kind of design configuration suits your style and taste.

Arguments against Flooring Underneath

That makes perfect sense. But other people will point out that flooring all the way underneath stoves, dishwashers, bathroom vanities, or kitchen cabinets is a total waste of money. They say it makes a whole lot more sense to omit those sections.

  • If you have 60 or 80 square feet of space occupied by counters and cabinets, for example, you can potentially save some cash to pay for the base moldings.


  • There is another reason you may want to go with cheap subflooring beneath those cabinets and counters. If you do not put your hardwoods underneath them, that makes it possible to install the heavy appliances and cabinetry first.


  • You don’t risk dragging a stove or heavy counter over the hardwoods and scratching or otherwise damaging them. Then install the floors cleanly, right up snug to the edge of your cabinets and they’ll look great and be a tight fit.

Perhaps the bigger question is what do you and your floor installer think is the best course of action? Have an in-depth discussion and let your flooring professional know your current vision as well as your long-term plans. Then crunch the numbers and pick the method that makes the most sense!

Visiting the Lazio Region of Italy

Thursday, June 7, 2012
by Dan Simon

The Lazio Region of Italy is located in the central area of the Italian peninsula and is the divide between the north and the south.  The west coast of this region overlooks the Tyrrhenian Sea.  Since the country of Italy is commonly known as the shape of a boot…  to get an idea of its geographic location just look down at your leg and it would be located just above and below your knee.  The name Lazio (pronounced ‘lattsjo) comes from the Latin, LATIUM.  Lazio is divided into five Provinces – Frosinone (FR), Latina (LT), Rieti (RT), Roma (RM), and Viterbo (VT).

Lazio Region and Provinces

The Lazio region is rich in culture and history perhaps most famously for being the center of the Roman Empire as well it is the world center of the Catholic religion home to the Vatican. The foundation of ancient Rome begins in the 8th century BC.  Outside of Rome this region is mostly plains and hills with a mountain region located in the Province of Rieti.

More than have the population of the entire region live in or around the city of Rome.  Lazio is the third most populated and the second richest region of Italy.  Rome has pioneered many engineering feats that have been the foundation of the technologies we benefit from today.  The area has inspired countless motion pictures like Gladiator.

There is no argument that can be made how much this region has influenced and inspired the world for centuries and that influence has even stretched to Urbanfloor and our Villa Caprisi Collection and hence the name ‘Lazio’  as the name of one of the 8-colors in this collection.  To view photos and get more details simply visit HERE.

Ron Call’s Tip of the Week #009- Keep Your Furniture from Sliding Across the Floor

Tip of the Week
Friday, May 18, 2012
by Ron Call, your Urbanfloor guy

Ron Call, your Urbanfloor Guy

Last week I talked about how to protect your hardwood floors from being scratched by your furniture by using felt pads under the legs of chairs and tables.  As a follow up to that, do you have young kids in your home that like to use your couches as a trampoline?

Kids love to play and jump on furniture.  The problem is that when they jump from couch to couch they tend to slide around on the slick surface of the wood floor.  To prevent your furniture from sliding around after you place your felt pads under the feet, head out to your local hardware store.

There you will find rubber mesh material typically used to line cabinet drawers and shelves.  Cut them to fit under the legs of your furniture with a pair of scissors and place them under the legs of your couches or any other piece of furniture that you don’t want to easily be moved.  Now your kids can pretend to be the next Olympic champion or the next super avenger and furniture will stay in place.

Have flooring questions?  Need expert help?  Need expert advice?  Just Ask Ron HERE

Ron Call’s Tip of the Week #008- Protecting Your Hardwood Floors From Your Furniture

Ron Call, your Urbanfloor Guy

Tip of the Week #008
Friday, May 11, 2012
by Ron Call, have flooring questions or need advice?  Ask Ron HERE

Protect your new wood floor from your furniture.  Place felt pads under the legs of all your chairs and furniture that you will be sliding around or moving for cleaning and dusting.  You can purchase them at your Urbanfloor dealer or your local hardware store.  Watch my video and see just how simple it is to protect your floors.  This is something you should do immediately after your floor is installed before replacing your furniture.

Ron Call’s Tip of the Week #007- Do It Yourself Molding Installation

Tip of the Week #007
May 3, 2012
by Ron Call, your Urbanfloor guy

Ron Call, your Urbanfloor Guy

If you have decided to tackle your own flooring installation be sure and read up on the subject and watch my videos.  An otherwise perfect installation of the floor can be overshadowed by sloppy trim installation.  Transition moldings and base boards will make or break the final look of any job.

Transitions can be tricky especially when working with a concrete sub floor where nailing them down is not an option.  Most installers will use a good construction adhesive and blue painters tape to secure them in place while the adhesive cures.  When installing multiple pieces for example at a tile or stone transition where there are angles, like a fireplace or tile entry way the installer often finds the next day after the adhesive has cured that the pieces have shifted and have become misaligned or there are now gaps.

This often necessitates buying new moldings and starting over as removal at this point almost always results in breakage.  This is often caused by some one stepping on them before the adhesive has had time to fully cure or the trim piece was slightly bowed and lifted up off the floor and the tape could not hold it.

A simple method to prevent this is to purchase a $20.00 hot melt glue gun from your local hardware store.  When applying your construction adhesive leave a small area on both ends of each piece and a small spot in the middle of the channel where the glue is to be applied.  This is where you will place dollops of thermal plastic glue.

Apply the construction adhesive first, making sure your molding is cut properly. (Dry fit first) Then quickly place the hot melt glue in the three spots where there is no construction adhesive.  Quickly place the molding in place and hold in securely for about three minutes while the thermal plastic glue sets up.

The thermal plastic glue will hold the molding in place until the construction adhesive has had time to cure.  No need for blue tape and your job is complete and your molding look like they where done by a pro.  Now go enjoy your new floor.

Ron Call’s Tip of the Week #006- A Squeaky Hardwood Floor and Baby Powder?

Tip of the Week #006
April 27, 2012
by Ron Call, your Urbanfloor guy

Does your floor squeak when you walk on it?  Older nail down type installations are notorious for squeaking.  But floating floors and glued down installations can make noise as well.  Seasonal changes will make your floor expand and contract and certain times of year the squeaking may be worse.  Squeaks are caused by loose boards rubbing against one another or a nail or staple used to install your floor to the sub-floor may be rubbing against a joist as you walk.  If your squeaking is throughout your home you may want to contact your floor covering professional as face nailing or crawling under the floor in your crawl space may be required.

Ron Call, your Urbanfloor Guy
But if the noise is localized to just a couple areas and you can see the culprit boards rubbing against one another as you walk, try using a little baby powder.  That’s right, just a little sprinkle between the noisy boards may be all you need to eliminate the squeak.  What happens is the powder works its way down between the boards and acts like a lubricant thereby eliminating the squeak.  Only use a very small amount, just sprinkle the effected area and try and work the boards up and down.  This will allow the powder to work it’s way down between the planks.  Clean up any excess powder immediately with a vacuum and a damp cloth moistened with just enough water to remove any powder residue but not enough to allow moisture to get between the boards (Damp.  Water should not drip from cloth).  Then dry with a clean cloth.  Baby powder on your floor is very slippery and any left on your floor may cause you to lose your footing and fall.  If this does not work contact your floor covering professional.

Ron Call’s Tip of the Week #005- Man’s Best Friend and Your Hardwood Floors

Tip of the Week #005
April 20, 2012
by Ron Call, your Urbanfloor guy

Ron Call, your Urbanfloor Guy

If you have dogs in your home especially large dogs it’s a good idea to have throw rugs strategically placed over your hardwood floors.  Place them under your coffee table, dining room table and if possible around the perimeter of your bed as well.

Hardwood floors can be be pretty slick.  Just ask your 6 year old who likes to slide around in his socks.  Some dogs have a difficult time getting up off the wood floor when they are lying down and will extend their claws to try and get a better grip thereby digging their nails into the wood flooring causing scratches.  If your dog has his favorite place to lay down, place a throw rug down.  It will enhance the designer look of your home, make your dog’s life easier and it may save you the frustration of having to pay to have scratches fixed.